
A Fly To Tie & Try July 2026
Fly of the Month – July by Les Lockey
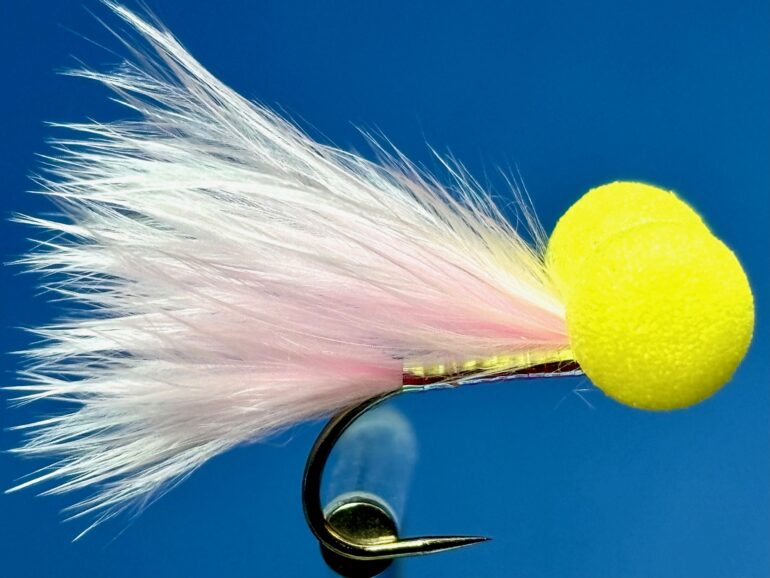
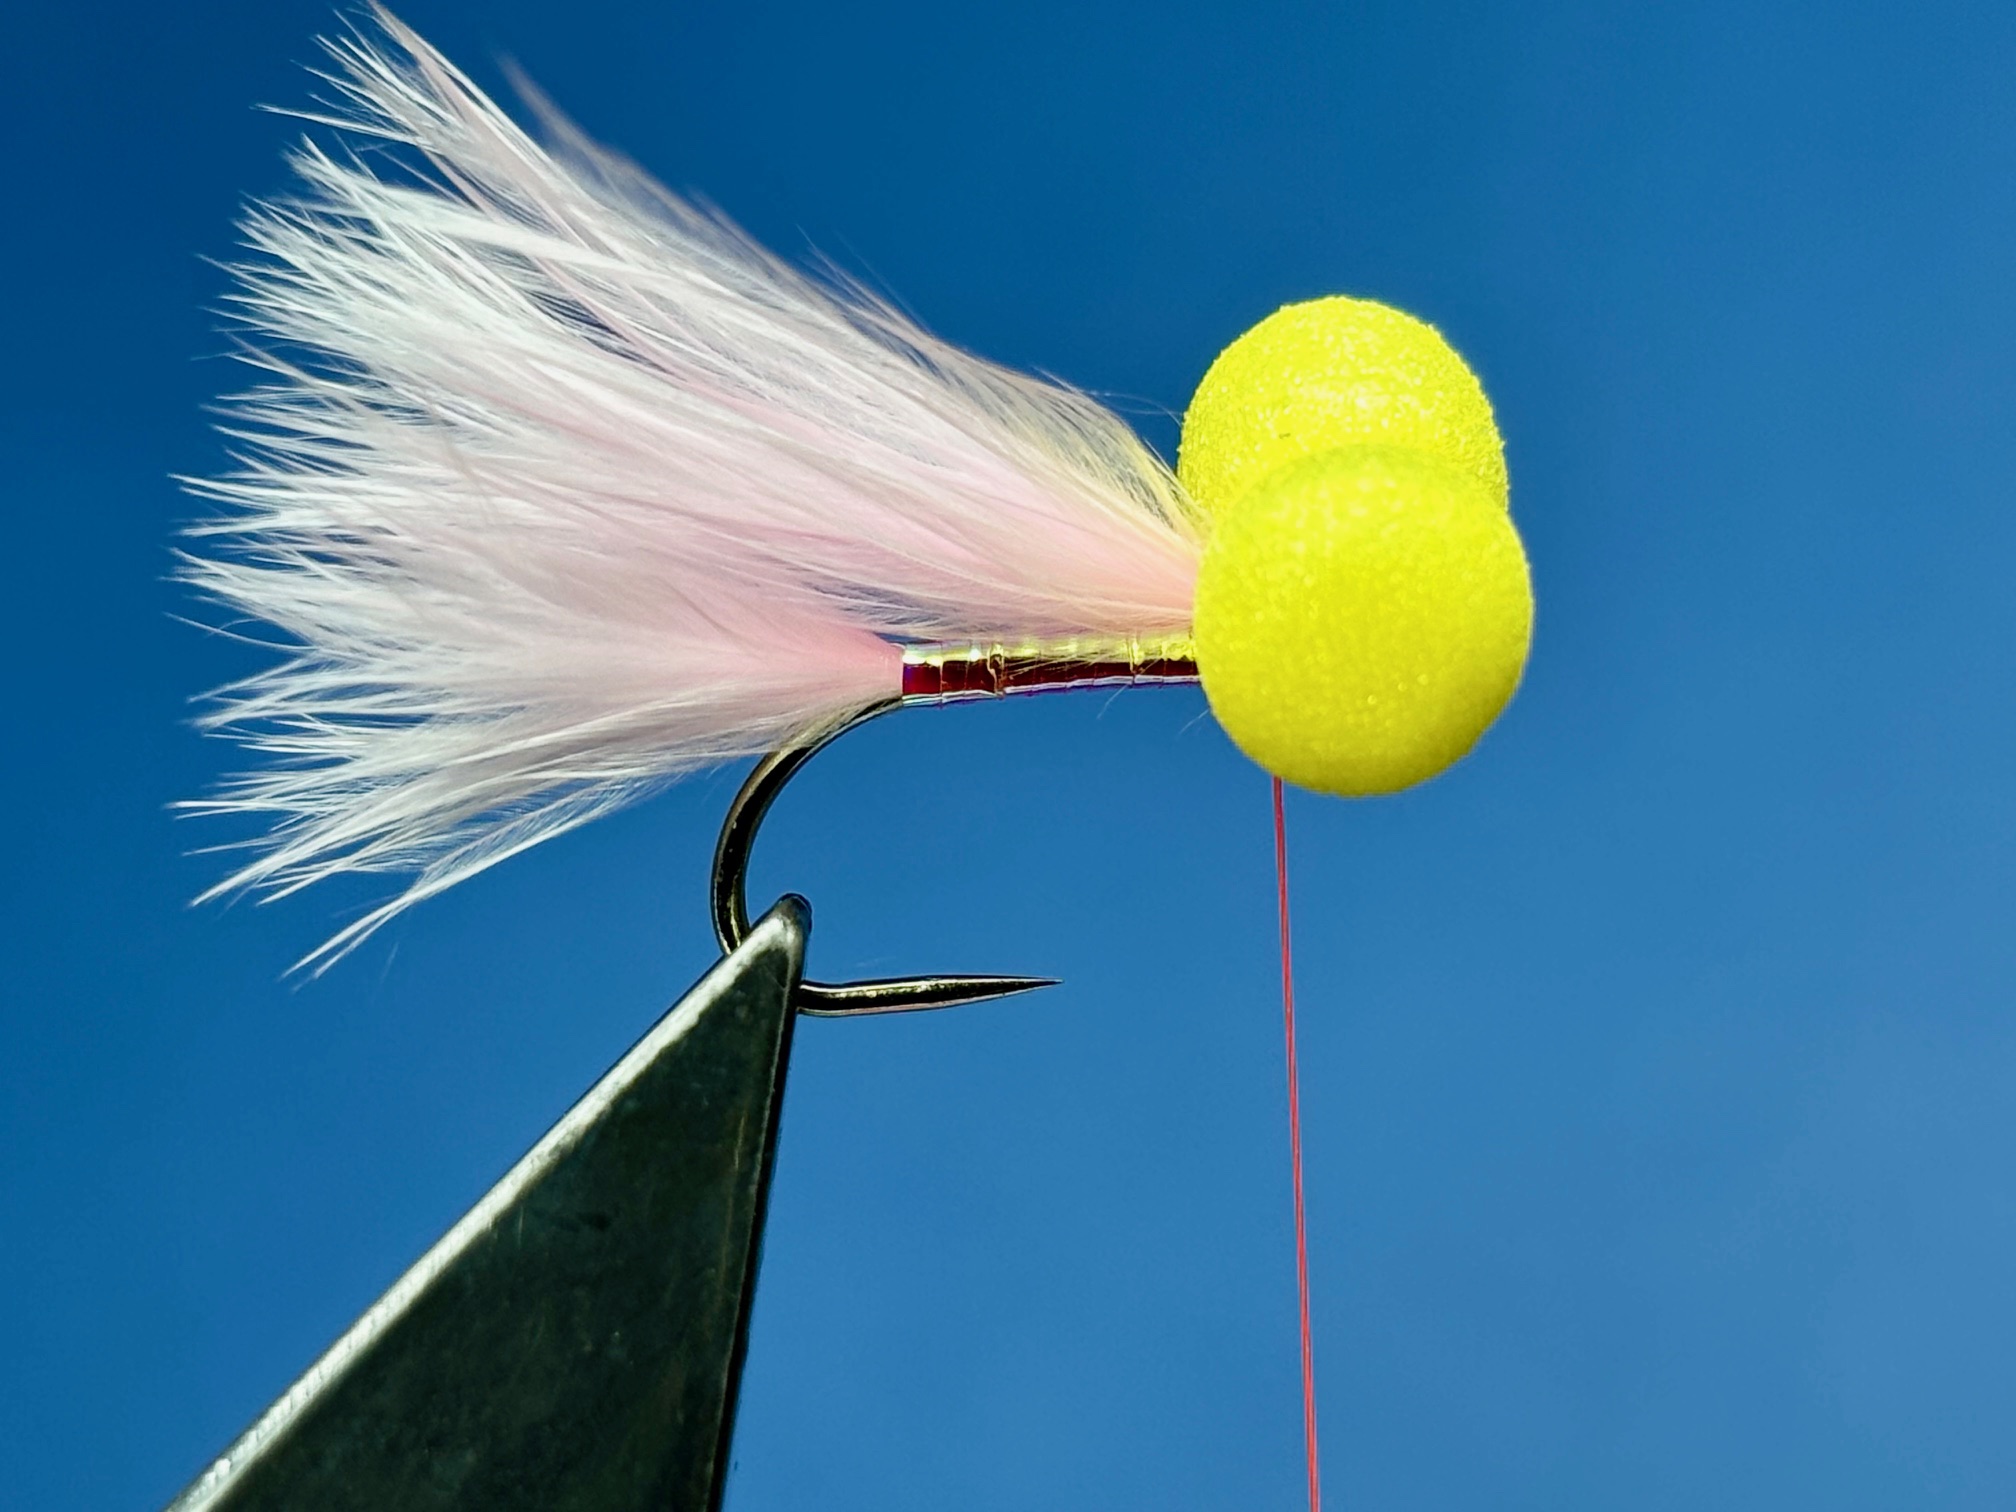
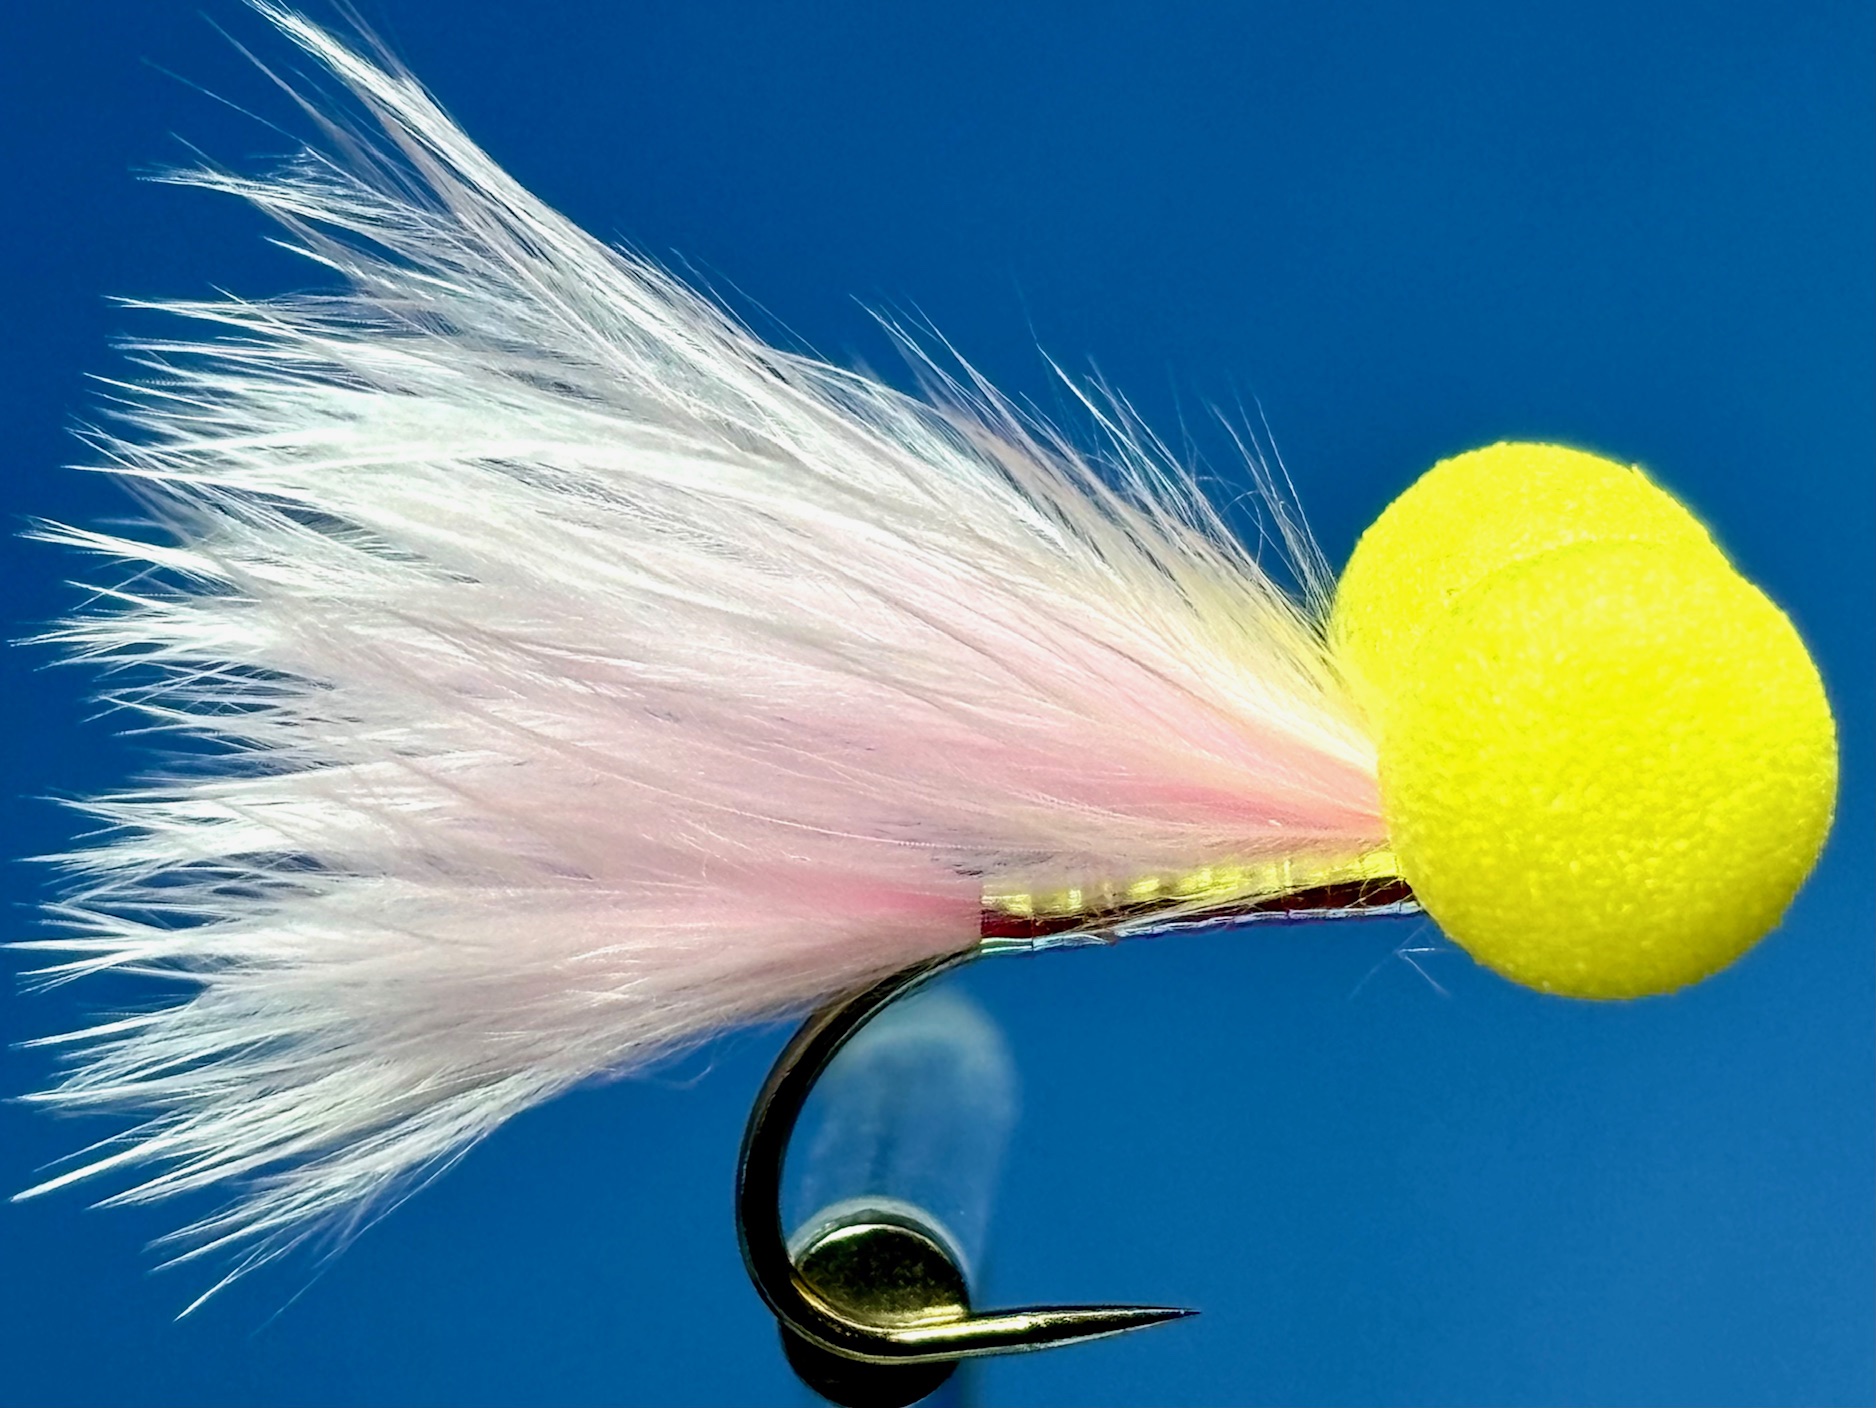
The Candy Floss Booby
Hook: Fario FBL 301 size 10, (barbless equivalent of a Kamasan B175)
Thread: UTC 70, fire orange.
Tail: Fluorescent candy floss marabou.
Body: UTC Opal Mirage tinsel, medium, wound over fire orange thread.
Wing: Fluorescent candy floss marabou.
Eyes: 5,6 or 7mm. diameter yellow foam cylinder.
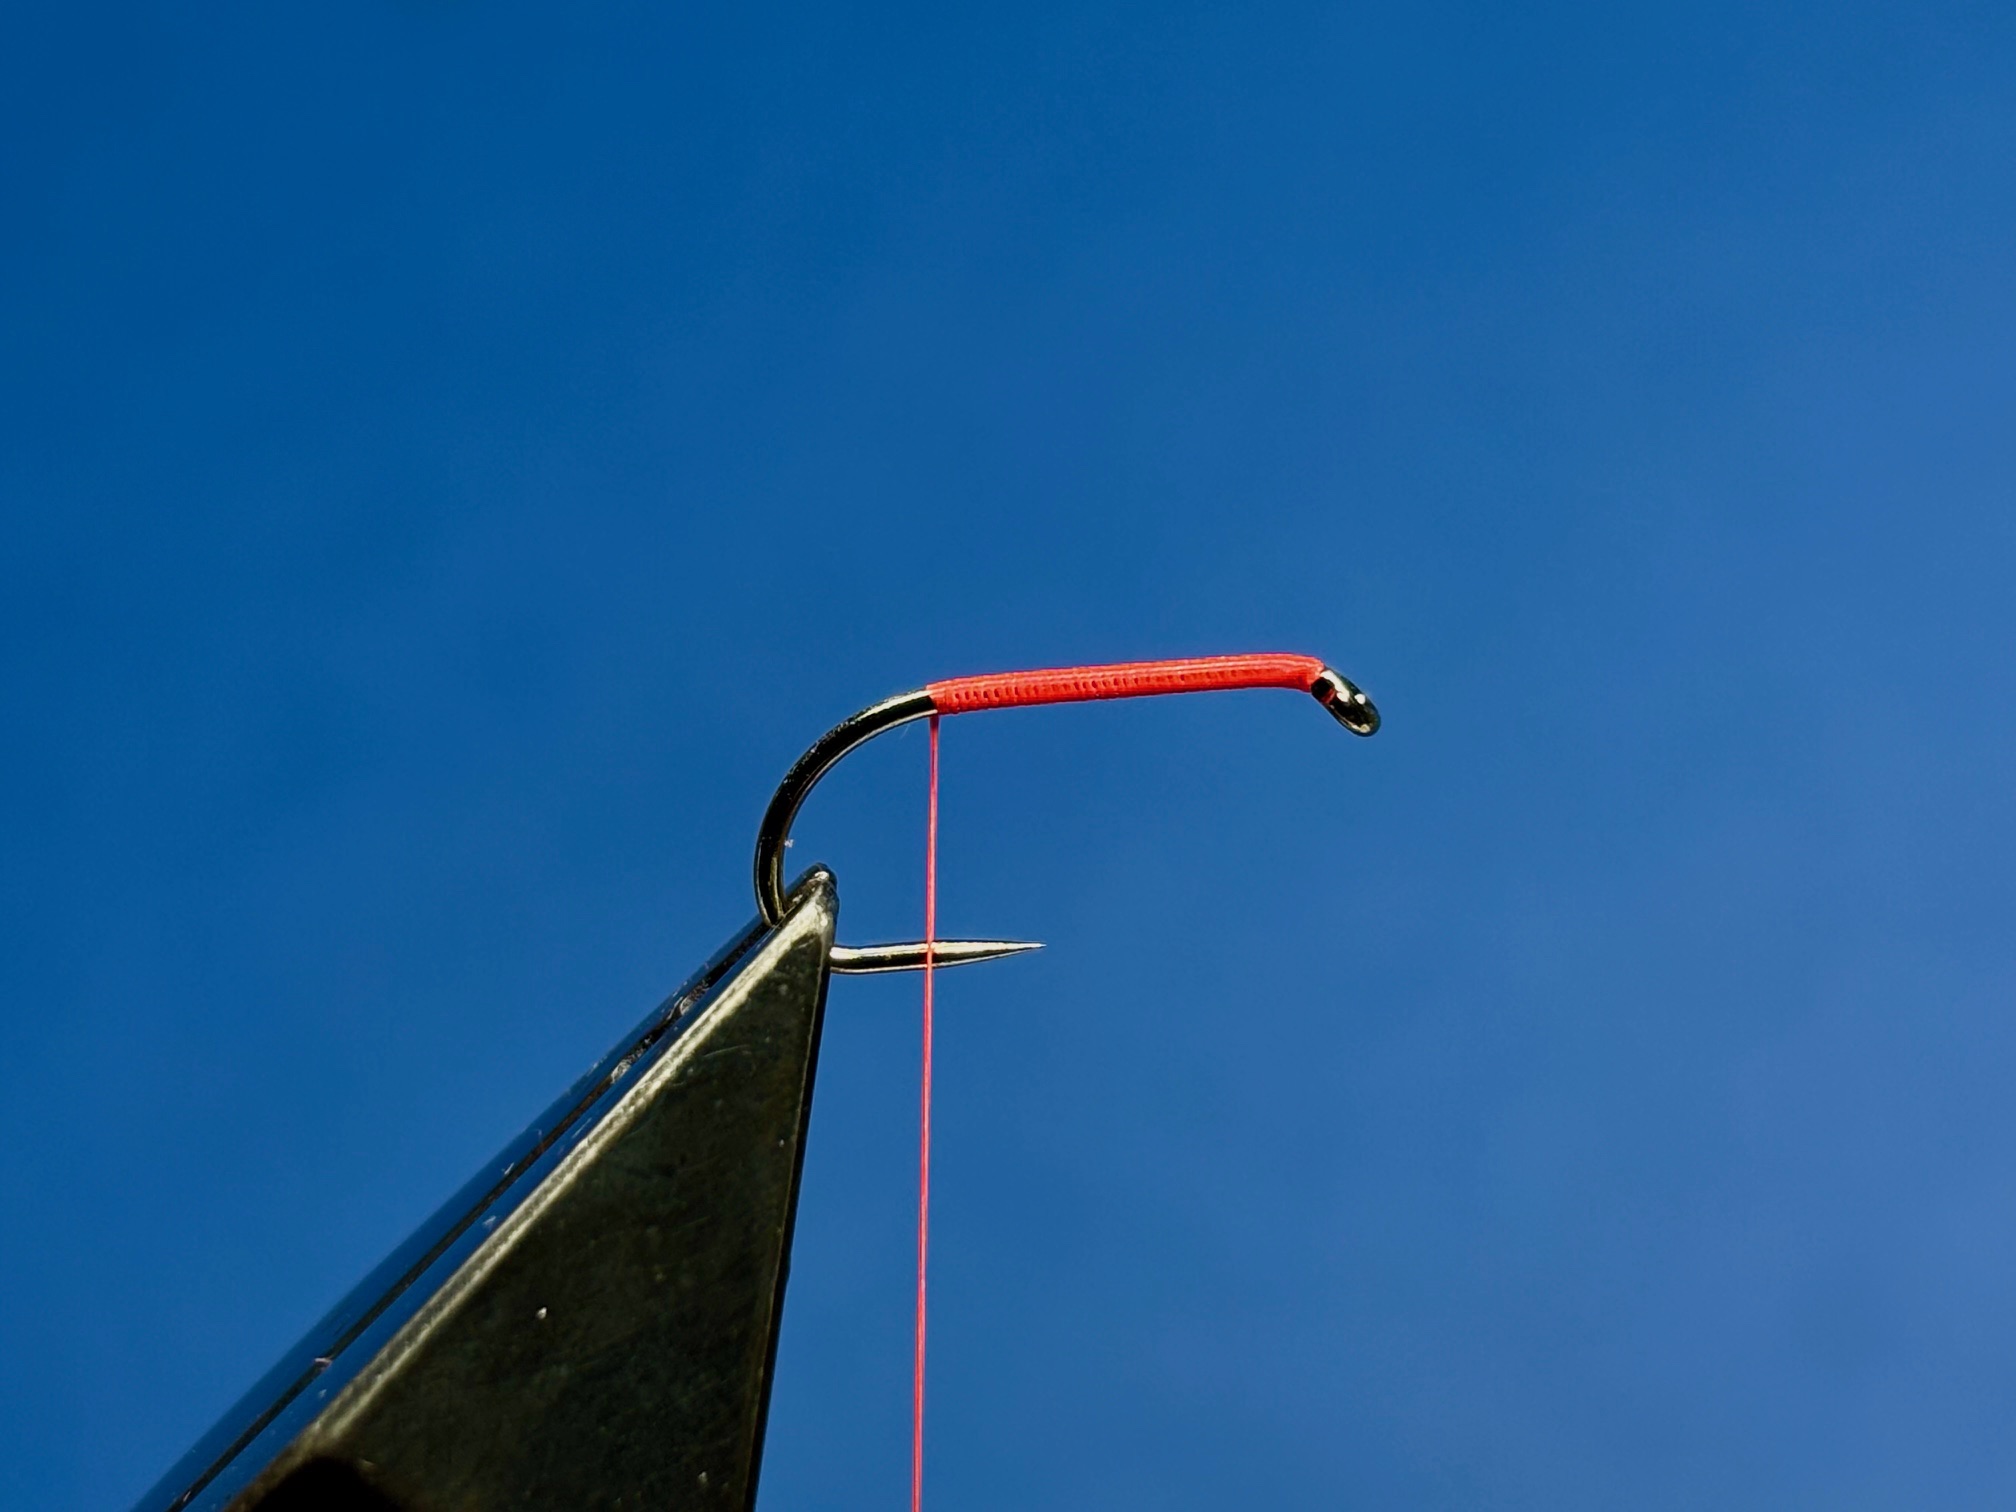
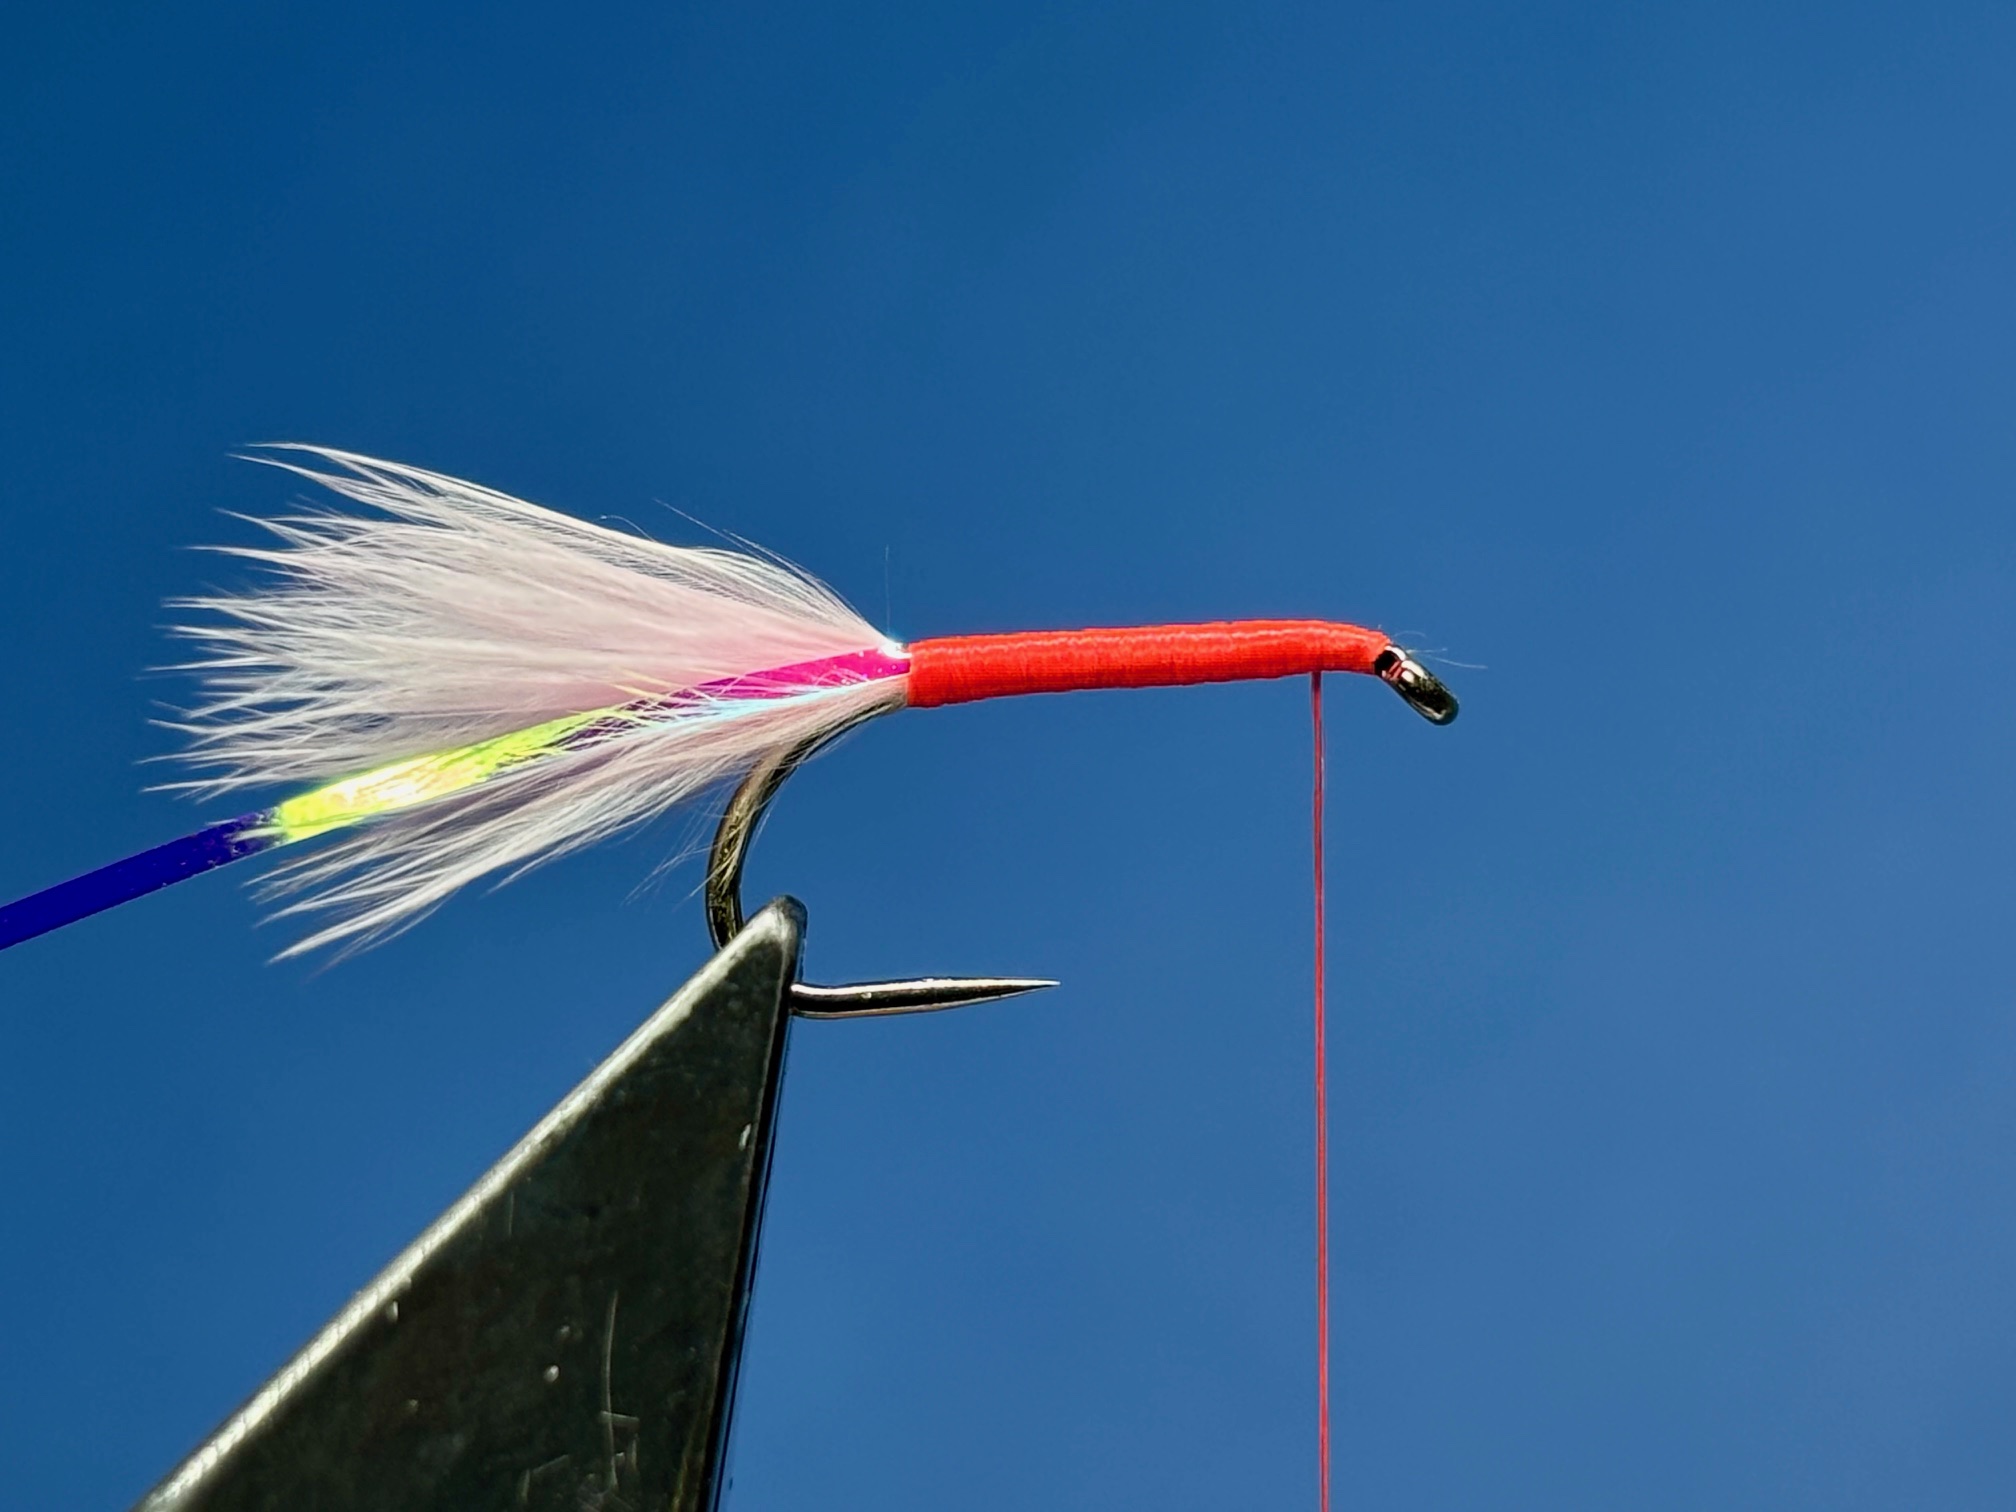
Photo 1. Secure the hook in the vice, and starting a couple of millimeters behind the eye, wind on the thread in touching turns to just before the bend of the hook and remove the waste thread.
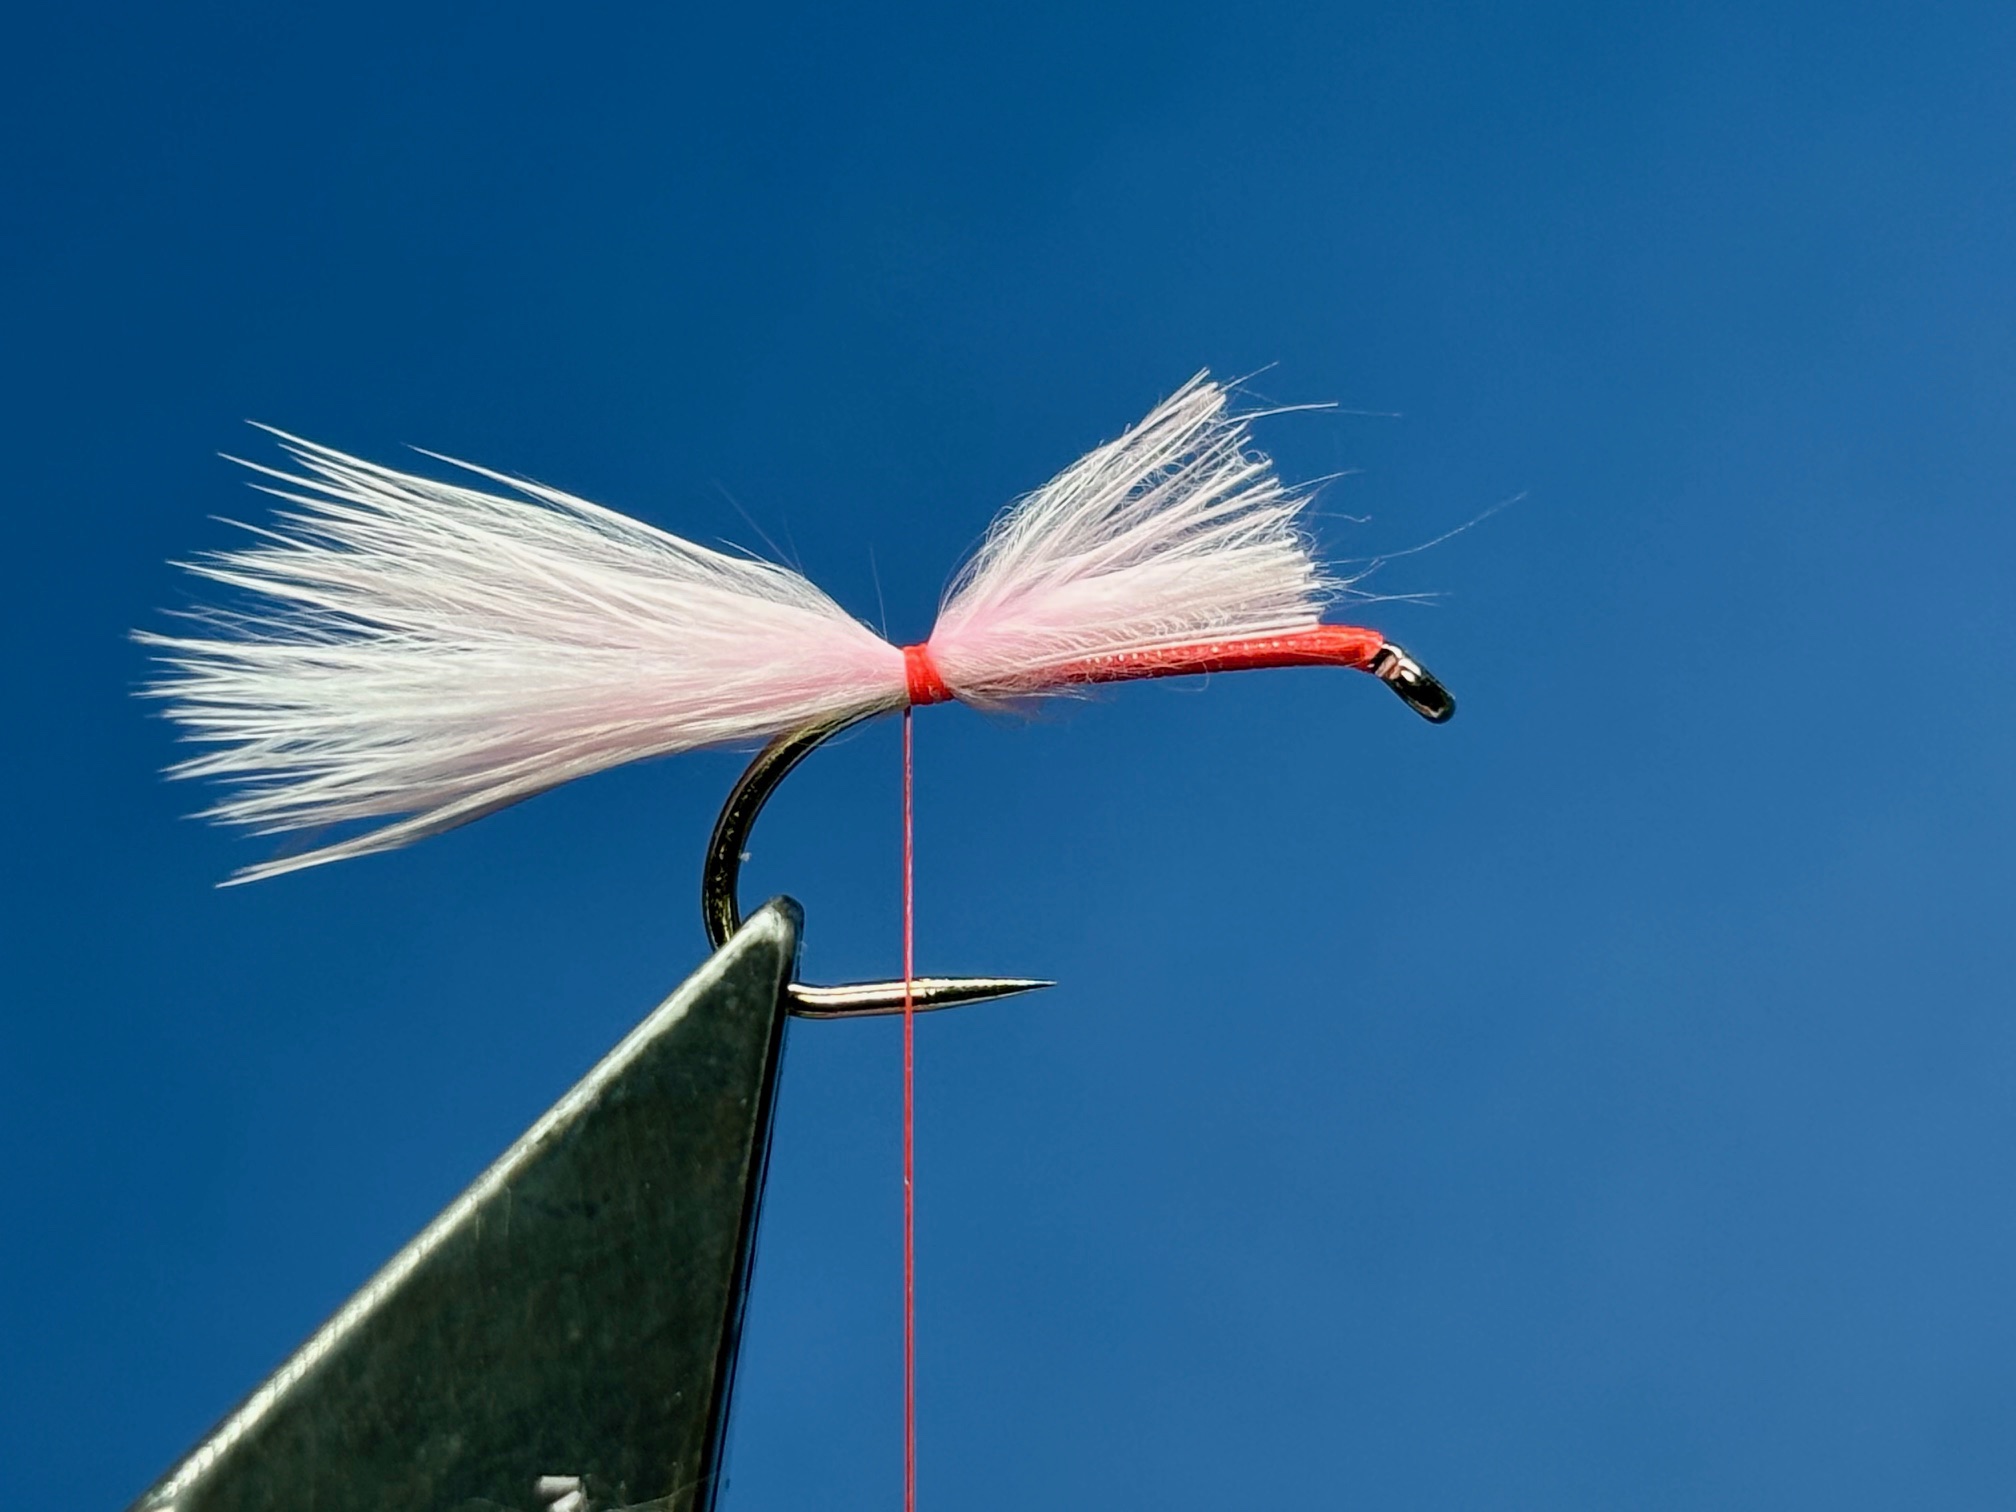
Photo 2. For the tail, remove a bunch of candy floss fibres from a marabou feather and holding the bunch by the base, twist it in your fingers to combine the fibres into a plume, then pinch off the tips of the bunch. Assess the bunch for length, cut off the waste end so it is almost the length of the shank and using your thumb nail and fore finger, remove the flue from the basal ends to reveal the bare marabou stems. The marabou tail can now be tied in on top of the shank with a two or three tight turns of thread.
Photo 3. Catch in a length of Opal Mirage tinsel leaving the tag the same length as the bare marabou stems.
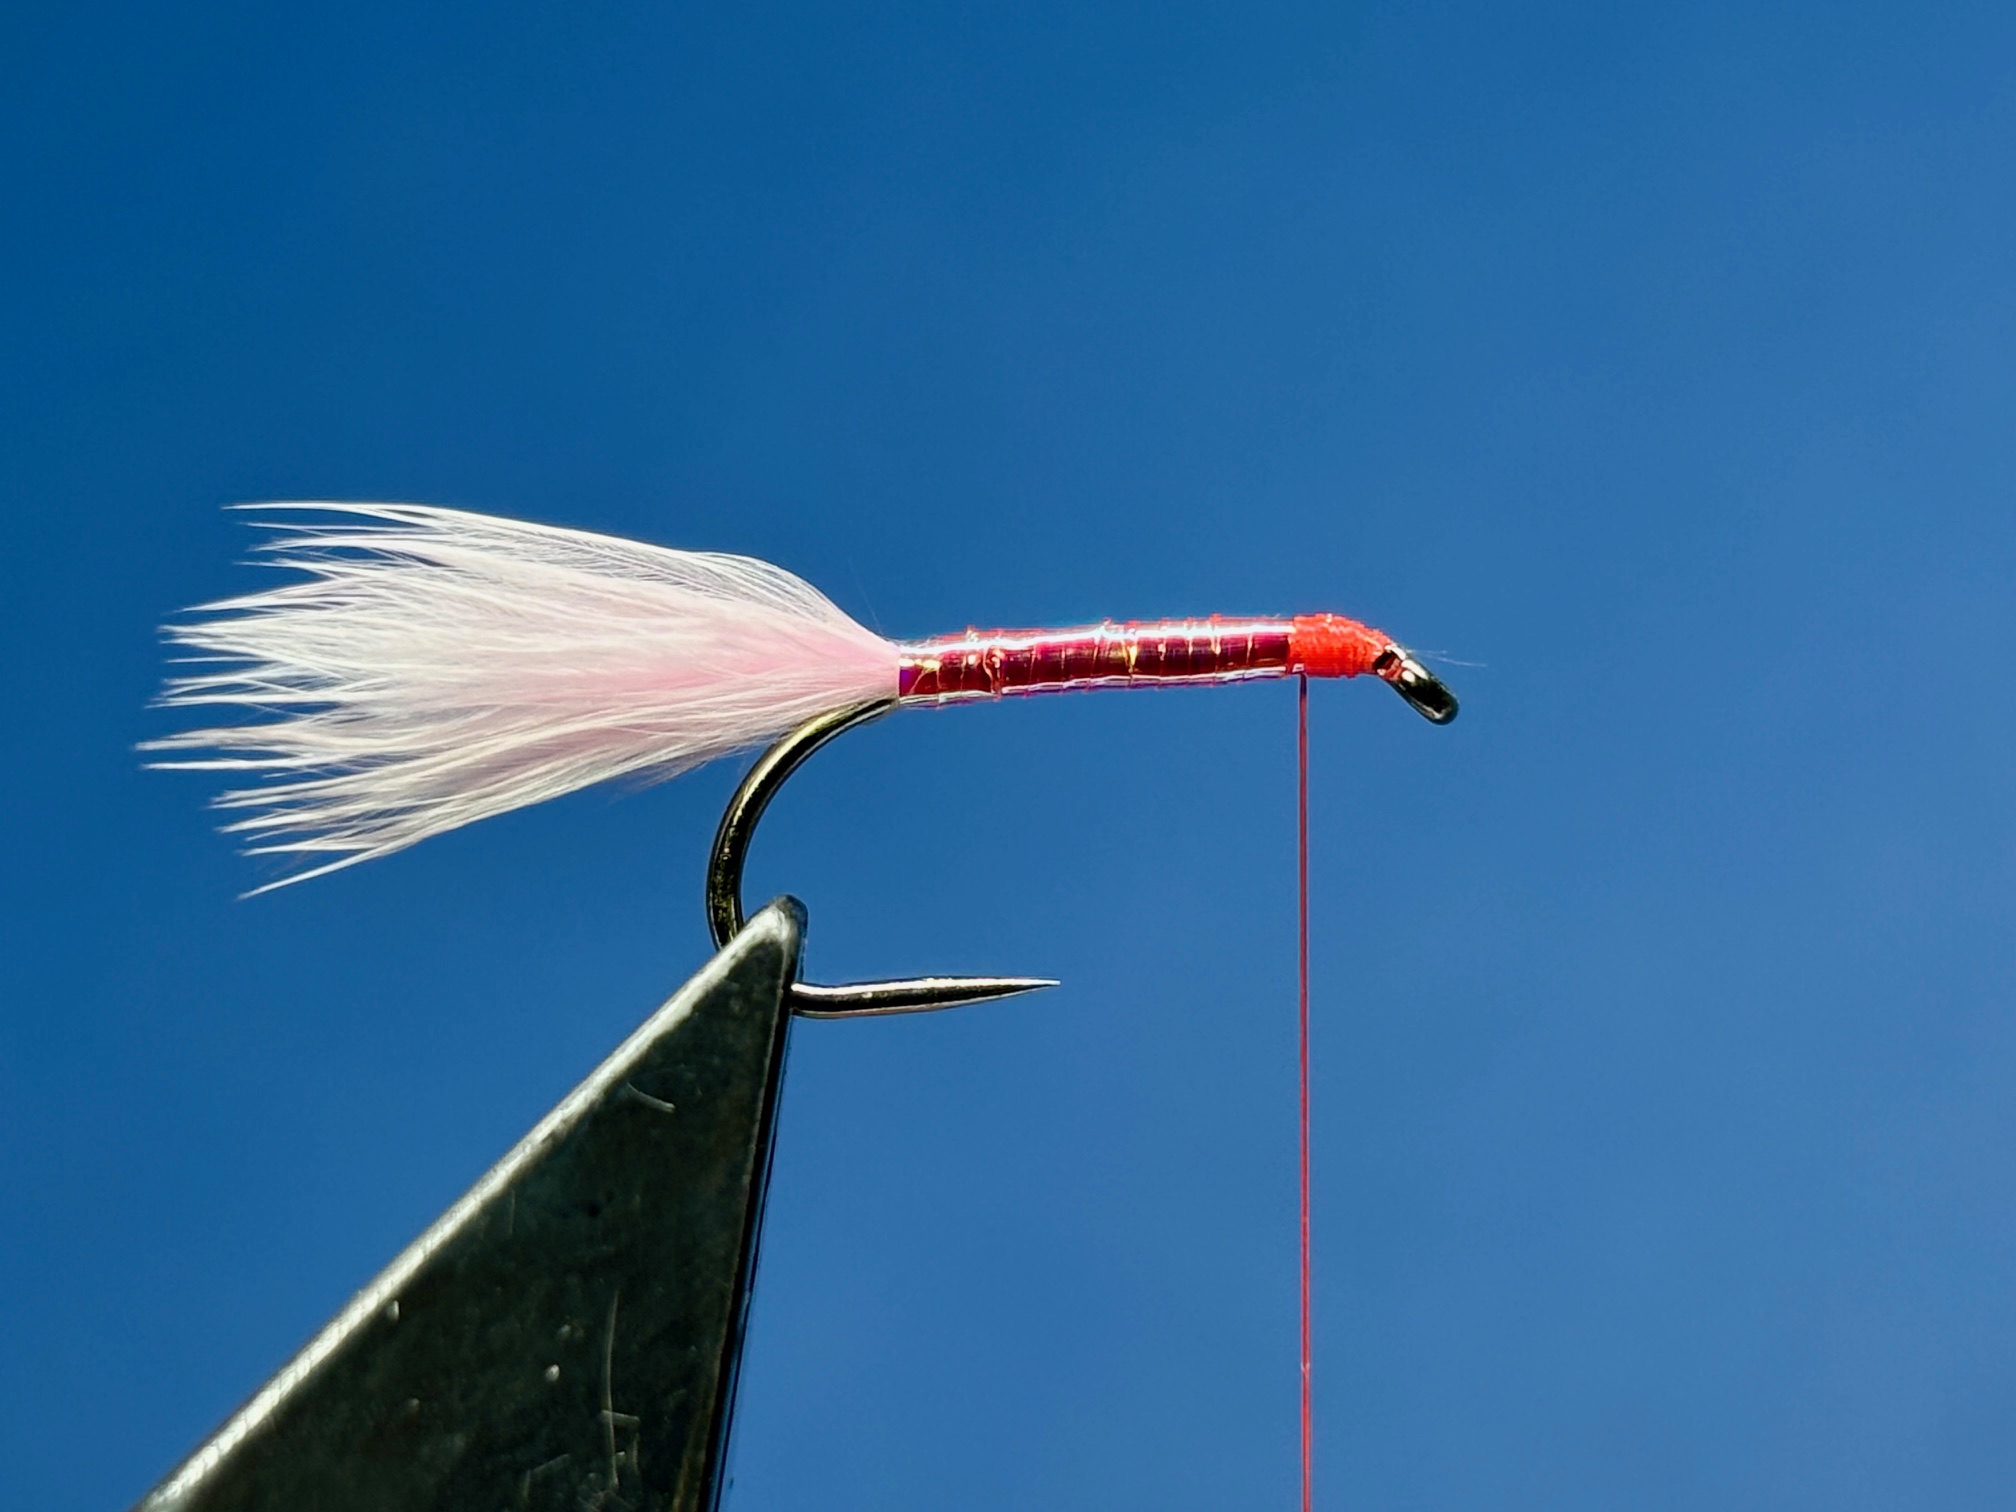
Photo 4. Using touching turns of thread, bind down the tinsel and the marabou stems stopping just before the hook eye.
Photo 5. Smear a small drop of superglue on to the thread wraps along the shank and allow a few moments for the glue to soak in, then using slightly overlapping turns, wind the tinsel along the shank until it meets the thread. Secure the tinsel with a few tight thread wraps and remove the excess tinsel.
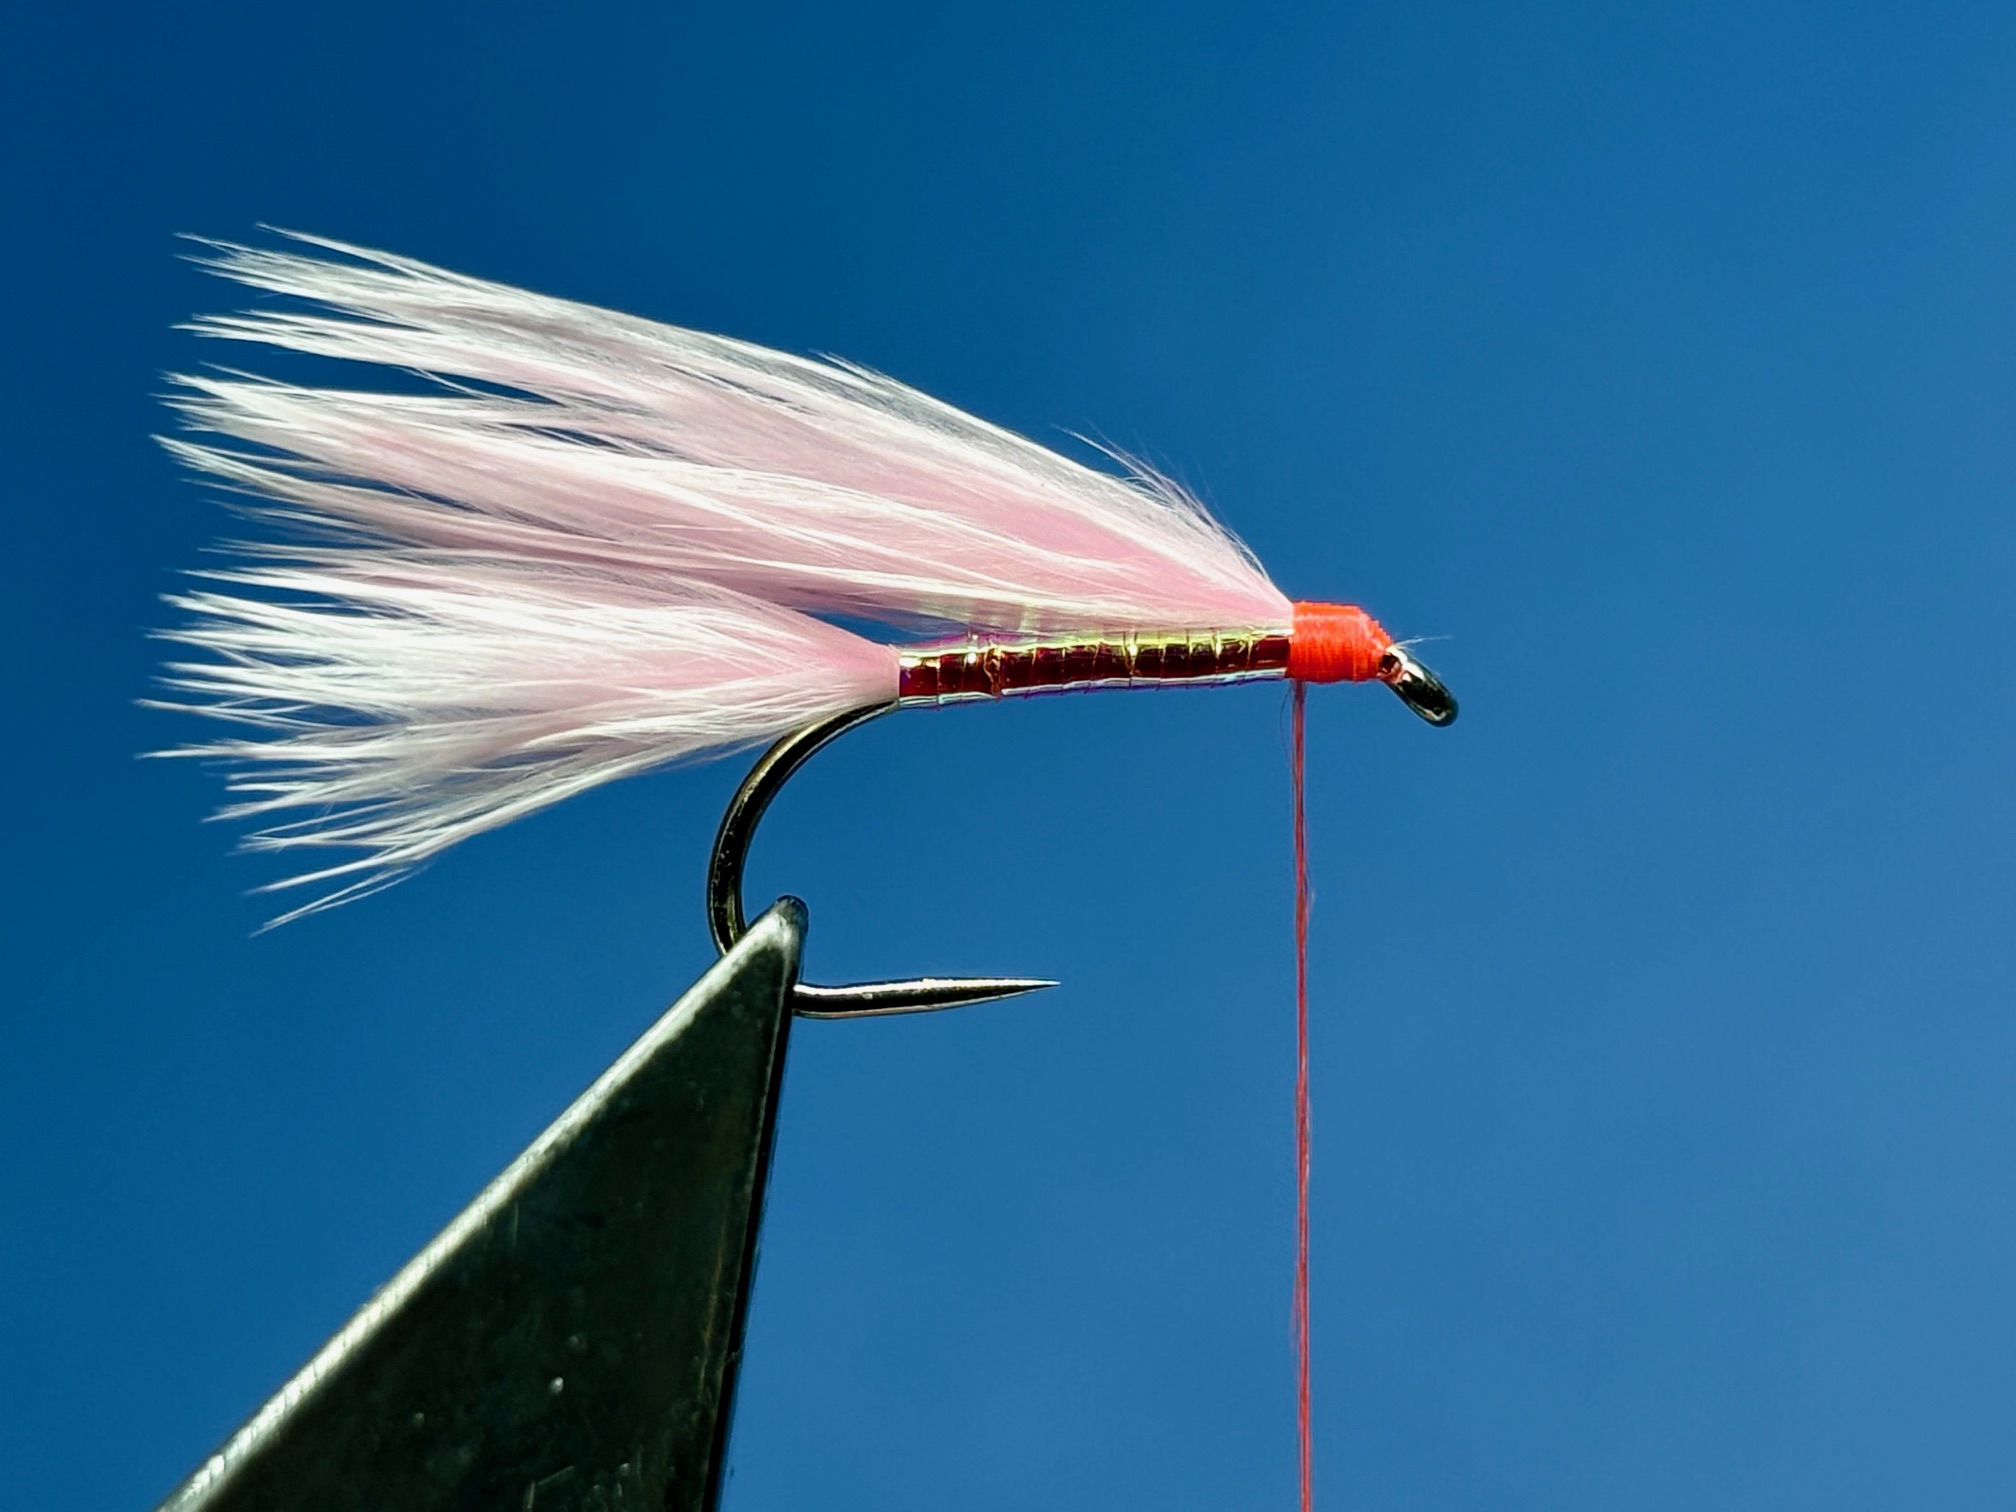
Photo 6. For the wing, prepare a similar sized bunch of candy floss marabou in the same manner as the tail and tie it in securely on top of the shank. Trim off the excess marabou at the eye and tidy the area with thread ready for the foam eyes.
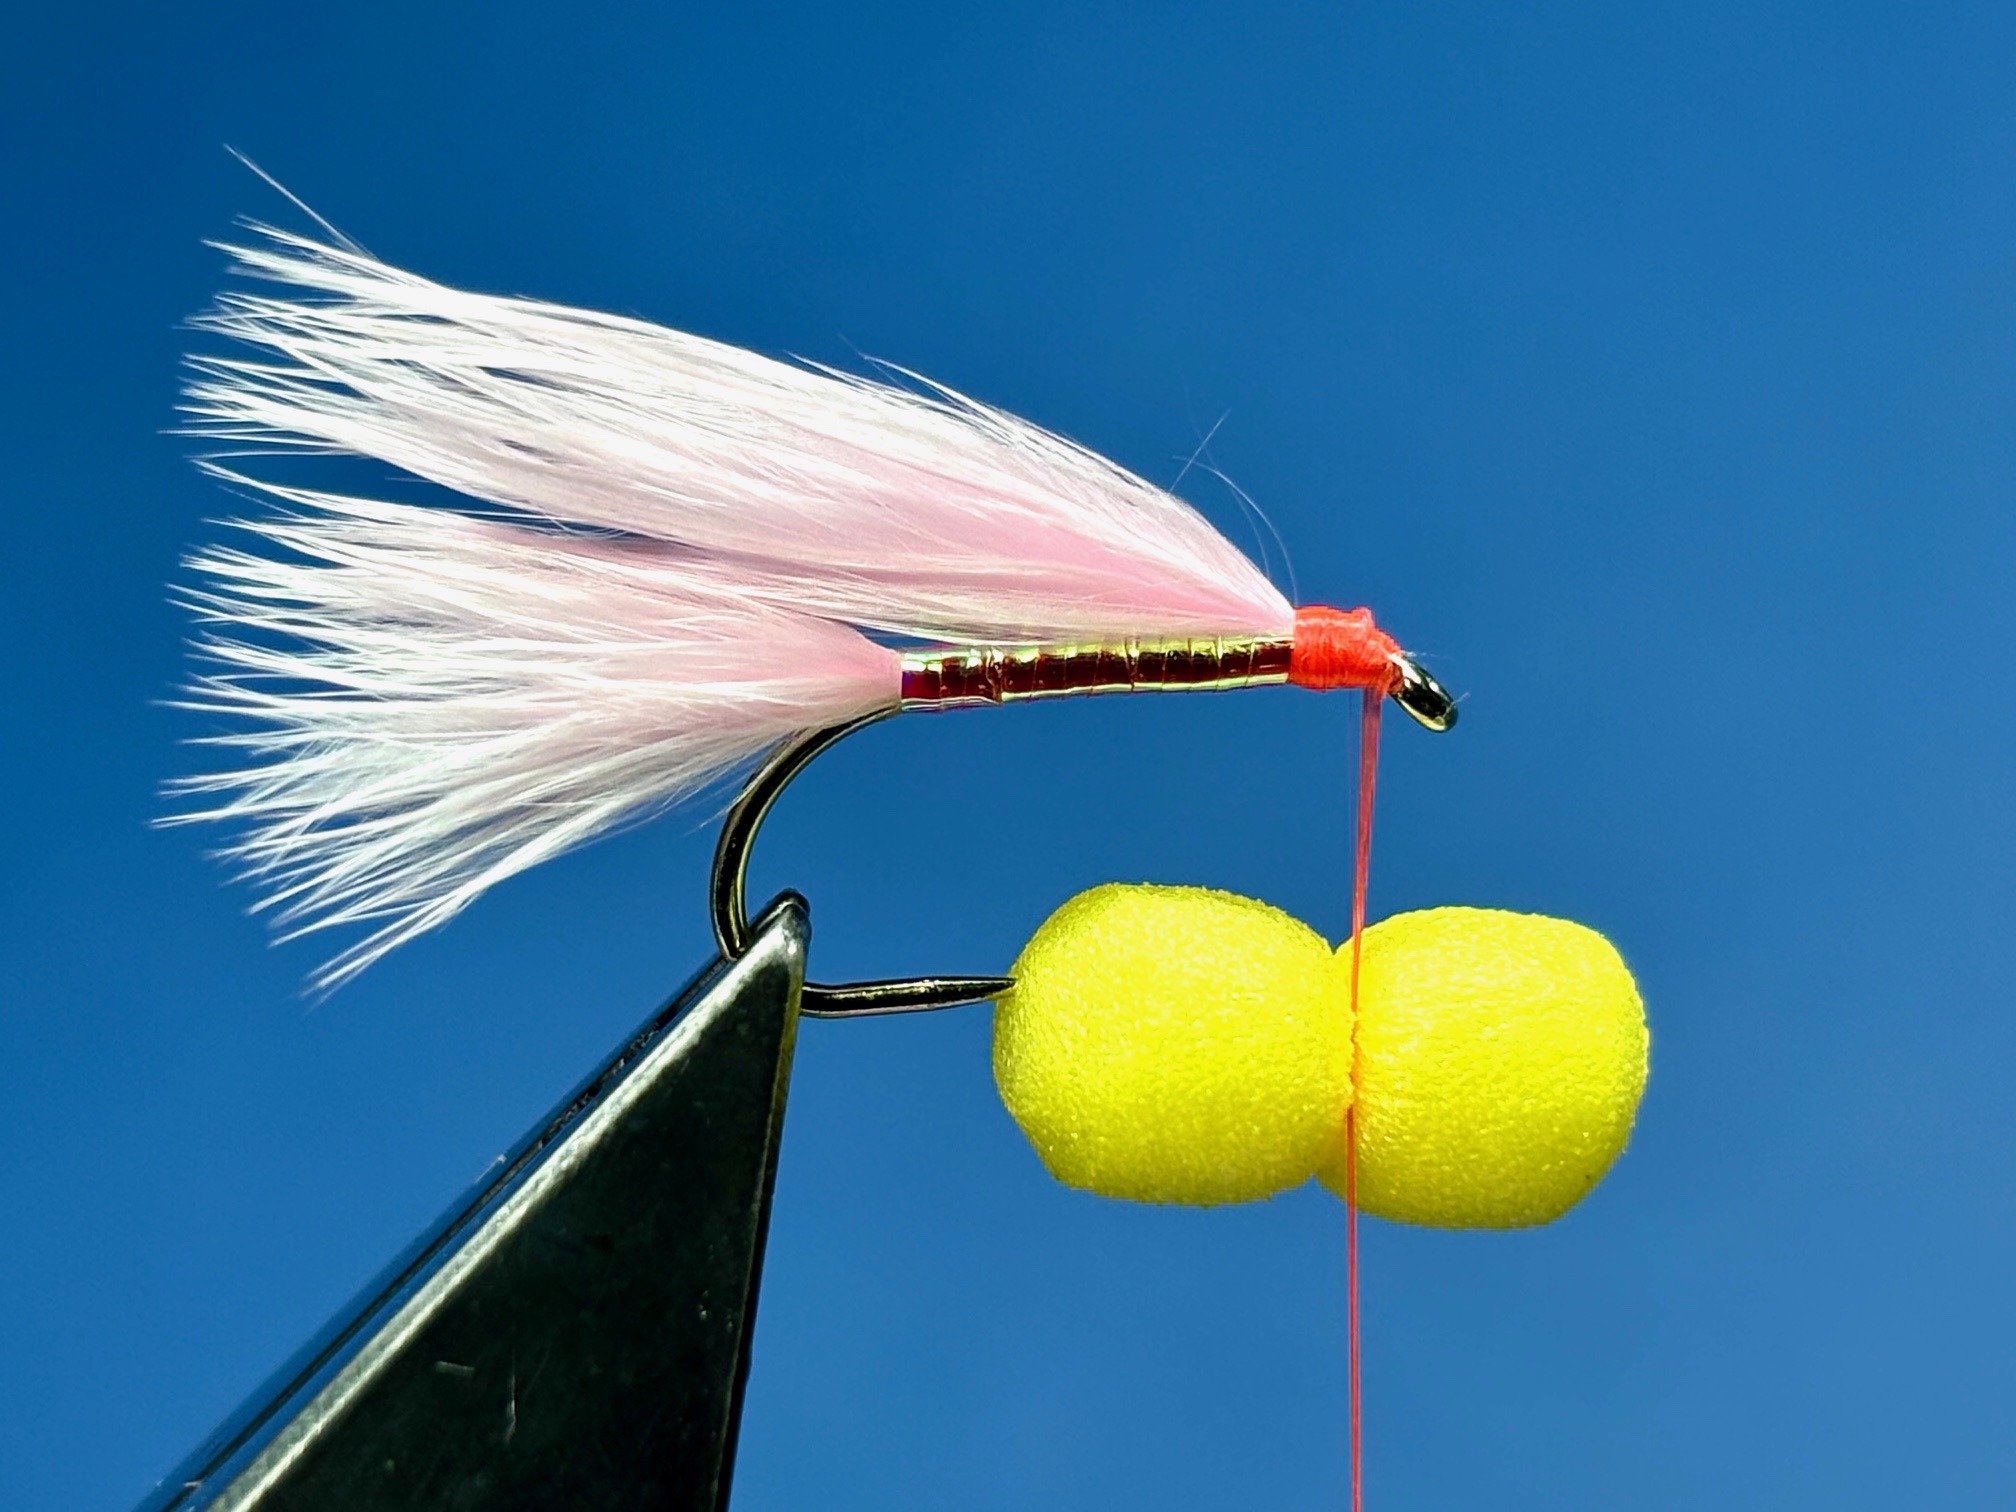
Photo 7. Take a prepared foam cylinder, (see the tying notes below) and wind a few turns of thread around the centre of the foam to form two equally sized balls of foam.
Photo 8. Wind the thread around the shank until the eyes sit on top of the hook and in front of the wing. Carefully secure the eye in position with a few figure of eight turns of thread around both eyes.
Photo 9. Bring the thread to the hook eye, add a drop of varnish to the thread and whip finish through it, then remove the thread to complete the fly.
Tying Tips
- This fly was originally tied using a mix of fluorescent white and baby pink marabou, but today fluorescent candyfloss marabou is commercially available. Despite this, some tiers still prefer to mix the two colours of marabou.
- For competition fishing, this fly is often tied on a size 8 short shank hook due to its wider gape, but it still fits within the international size gauge.
- Always pinch marabou to length – it produces a more natural finish and where possible, pinch off the uneven tips, as this leaves the strongest and densest fibres. Once the fibres are tied in either for the tail or the wing, I dampen the marabou with moistened fingers prior to help control the marabou, avoid contaminating the tail with glue and stops the thread from catching the wing fibres when securing the eyes.
- The essence of all booby patterns relies on two equally sized foam “eyes”, the size of which depends on the prevailing weather conditions and the manner in which the fly is to be fished. Larger eyes work best in windy weather or when the fish are prepared to chase, while smaller eyes are more suited to the washing line technique.
- The symmetry of the foam eyes is critical to way the fly fishes. Non symmetrical eyes cause the fly to spin when casting and during the retrieve causing twists in the leader. The good news is that preformed booby eyes can now be purchased from various fly tying retailers, although this is an additional expense and available sizes can be limited, so I make my own.
The process starts by cutting out cylinders of the appropriate diameter and colour from blocks of Plastazote foam using an electric drill fitted with a suitably sized Gunville foam cutter available from Upavon Flytying. The cylinders are then cut in half transversely and all the ends trimmed with scissors to form a more rounded profile, and for many tiers that is the job done, but if like me, you want the eyes to be smoother and even more symmetrical, then they should be baked in an oven at about 160 degrees for about 2 minutes. Each oven varies so a bit of trial and error will be needed to find the best time and temperature combination. I bake the foam eyes in batches by spreading them out in an old roasting tin covered with tinfoil to prevent the foam from being blown around in the fan assisted oven. It is a good idea to use foam cylinders that are a size bigger than required as the heating process slightly shrinks the foam.
- Having prepared the foam, the next process is to tie it onto the hook and form two symmetrical round eyes and here there are basically two options. The first is to position the foam longitudinally on top of the hook parallel to the shank and take a couple of securing thread turns around the middle of the foam forming two equal balls of foam. The foam is then twisted through 90 degrees and secured in place with several tighter turns of thread, forming the “eyes” in the process. This method makes it easy to find the middle of the foam which helps produce symmetrical eyes, but care needs to be taken to ensure the set of the wing is not disturbed. The second option is to form the eyes directly on to the thread by taking a few turns of thread around the middle of the foam trapping the eyes onto the thread. The thread is then simply wound around the hook until the eyes sit in position on top of the shank where they are secured using a couple of figure of eight wraps with three diagonal turns behind the foam and three more in front. Again, it can be helpful to moisten the marabou wing prior to winding on the foam eyes as it allows the thread easy access when securing the eyes in place. This method makes it easier to get the eyes in position without disturbing the wing and less likely to trap any of the wing fibres when securing the eyes in place, but finding the middle of the small foam cylinder can be tricky as much of the foam is obscured by your fingers. To avoid this, I insert a fine needle into one end of the foam which allows me to gauge the middle quite easily. Alternatively, place the foam cylinder on your desk and lightly press the side of a fine needle into the middle of the foam to produce a slight indentation which can then be used for locating the thread in the middle of the cylinder.
- Some tiers place a small drop of superglue between the two foam eyes and then press them together to produce a more stable buffer and make the fly less likely to spin, but I’m not sure it makes that much difference. If additional security is felt necessary, a small smear of superglue can be added to the thread wraps under the eyes.
- A very successful variant of this fly, known as Jock’s dry fly, is identical in every way except it is tied with white thread and not hot orange.
Fishing hints
- This is a very successful and much used competition pattern which built its reputation on the Lake of Menteith, but it catches well just about everywhere it is used.
- The fly can be fished on any density line from a floater to a Di8 fast sinker, but for Coldingham Loch and depending on conditions, a floater, midge tip or intermediate line should normally suffice.
- This pattern is generally fished in one of two ways – as a single fly with either a tweaked, or fast stripped retrieve, or on the point as part of a washing line set up, but I also know some anglers who successfully fish the pattern on the top dropper with two nymphs below it.
- Another option is to fish a deep mini washing line on a fast sinking line with two boobies, one on the point and the other on the top dropper and a small buzzer or nymph suspended between them on the middle dropper.

Recent Comments